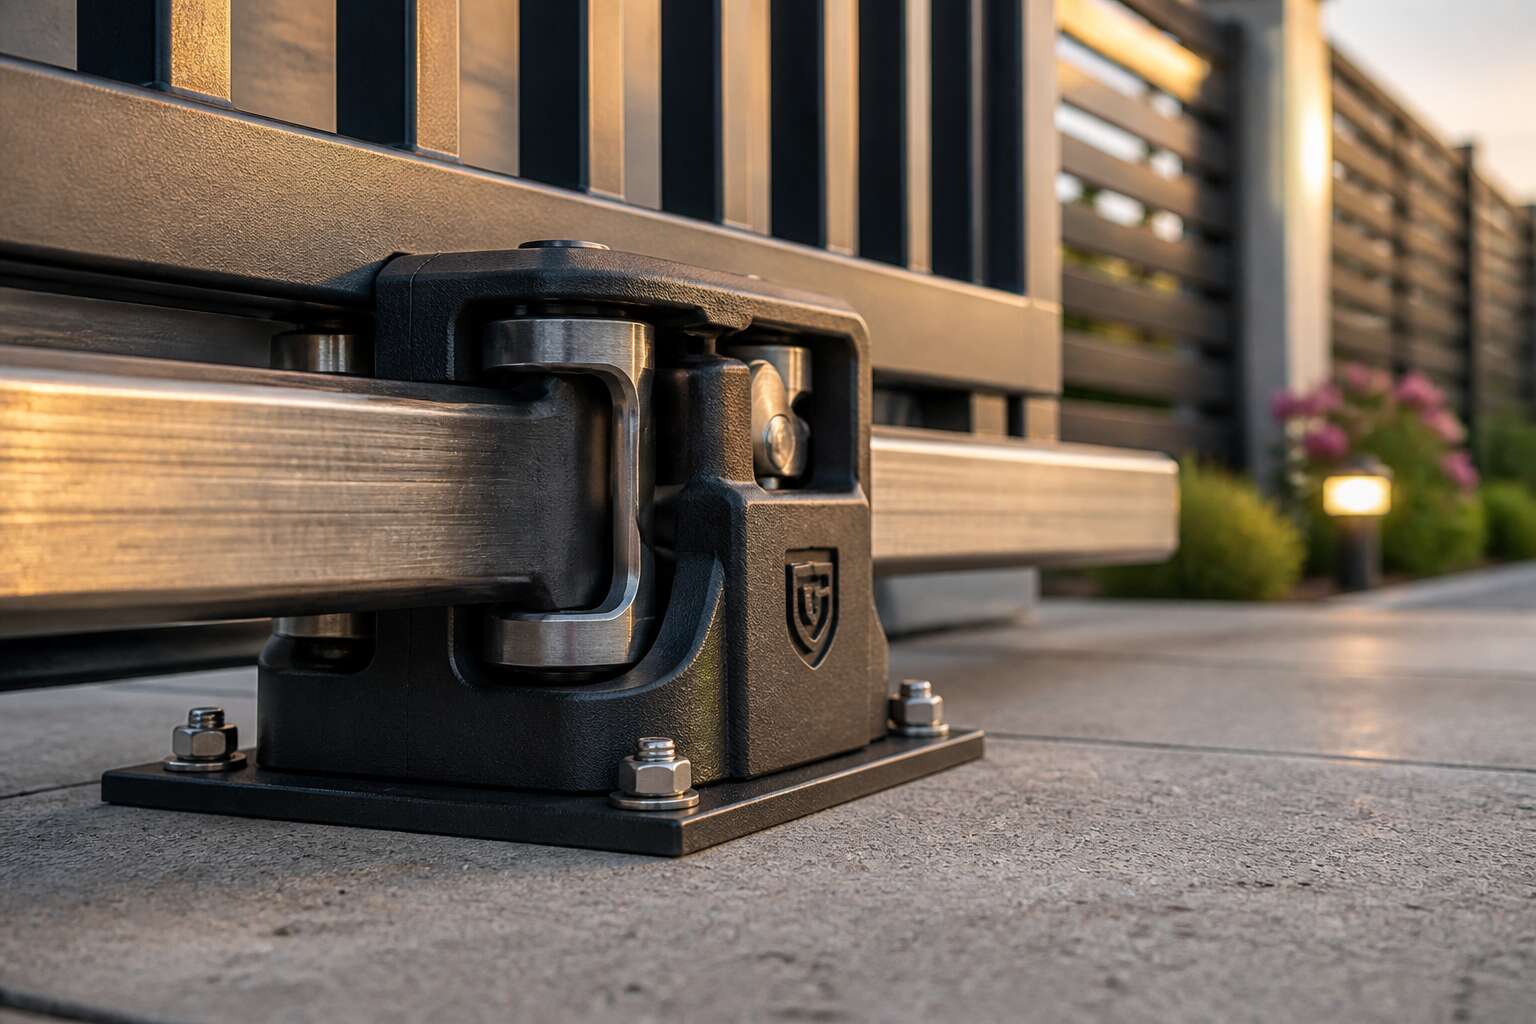
Understanding Gate Guide Block Systems
What Are Guide Blocks and Their Role in Gate Operation
A misaligned gate can waste more electricity than a broken motor. That is because the sliding gate guide block silently absorbs every error in alignment. These blocks are the contact points between the gate panel and its support structure. They keep the gate moving in a straight line without allowing sideways drift. I have seen entire automation systems fail simply because the guide block was worn out.
The role of a guide block is deceptively simple. It bears the gate’s weight, reduces friction, and protects the track from uneven wear. A typical unit uses a nylon or composite surface that slides against the gate’s bottom edge. This surface works with the gate’s own momentum to keep operation smooth.
Here is what a properly functioning guide block manages:
- Vertical support to prevent sagging
- Lateral control to stop the gate from swaying
- Impact absorption when the gate ends its travel
In South Africa, where winds and uneven driveways are common, these blocks earn their keep. The gate’s motor depends on consistent resistance. A damaged guide block changes that resistance, causing the motor to overwork. That is why a quick inspection of this component should never be skipped during routine maintenance.
Key Components and Materials Used in Manufacturing
A sliding gate guide block is judged by the materials used in its core. Most manufacturers choose nylon, polyurethane, or a composite blend. Each material handles friction differently. Nylon offers smooth movement, while polyurethane resists the abrasive grit common on South African driveways.
Every guide block system depends on a few key components. The base bracket anchors the unit to the ground. The wear face makes direct contact with the gate panel, and the adjustment bolts fine tune the gap between them. If any one of these falls out of spec, the whole gate suffers.
- Base bracket: forged steel or galvanised iron
- Wear face: nylon or composite material
- Adjustment bolts: stainless steel for coastal climates
I have watched a sliding gate guide block fail within one year simply because the wrong plastic was selected. The material choice must match the environment. Get that right, and the component will outlast the motor.
How Guide Blocks Differ from Other Gate Hardware
Some gate installers assume any bottom guide will perform the same function as a wheel or roller. That assumption costs homeowners time and money. A sliding gate guide block differs fundamentally because it does not carry the gate’s weight. It controls lateral movement and keeps the panel tracking straight along the ground. Rollers bear the load. Hinges anchor the gate to a post. The guide block simply steadies the bottom edge.
This distinction matters on uneven driveways where a gate can drift sideways.
– A roller supports vertical weight and rolls along a track.
– A sliding gate guide block hugs the panel and prevents sway.
– A hinge fixes the pivot point at the gate’s side.
Each component has a separate job. Mixing them up leads to premature wear on the motor and misalignment. The guide block acts as a quiet restraint, absorbing side forces without adding rolling resistance, which is why proper selection matters so much in South African installations.
Critical Factors for Selecting the Right Guide Block
Load Capacity and Weight-Bearing Considerations
Every sliding gate guide block carries a burden that extends beyond its visible mass. In South Africa, high winds and uneven driveways demand serious attention to load capacity. A block that suits a light residential gate may fail under the repeated stress of a heavy steel barrier.
- Static weight of the gate panel
- Dynamic forces from acceleration or braking
- Momentary loads from wind gusts
Weight-bearing considerations also involve the gate’s track alignment and the contact surface. A guide block with insufficient capacity can distort over time, causing misalignment and premature wear. Selecting the correct rating requires measuring the gate’s actual mass, not guessing from its dimensions.
Environmental Resistance and Weather Durability
South Africa’s climate runs a permanent stress test on outdoor hardware. One coastal winter can corrode fittings that lasted years inland, while Highveld ultraviolet rays wreck cheap plastics within months. Environmental resistance separates a reliable sliding gate guide block from a recurring expense.
Material choice matters most here. Nylon copes with heat and grit better than many alternatives. Galvanised steel holds up to rust when properly coated, but coastal properties often need marine grade components. Dust and sand demand sealed designs that keep fine particles out of bearing surfaces.
Assess these conditions honestly before choosing:
- direct sun exposure throughout the day
- distance from the ocean
- annual rainfall and humidity patterns
- airborne dust around the property
Local weather patterns decide the block’s lifespan. Ignore them and no sliding gate guide block will perform as promised.
Compatibility with Various Gate Types and Track Systems
We cannot stress this enough: compatibility demands more than a passing glance. A sliding gate guide block that suits one gate type may fail entirely on another. Cantilever gates require blocks designed for their specific rail profile, while wheel-mounted setups need units that track cleanly without binding the assembly.
South African fabricators produce custom gate designs, each with its own quirks. Track width, rail height, and travel distance determine the correct fit. The sliding gate guide block must sit flush with the track surface and tolerate the gate’s particular movement pattern.
- Track profile and rail dimensions
- Gate type and movement mechanism
- Mounting orientation and available clearance
Choose the block for the gate actually on your property, not the one in the catalogue. That simple discipline prevents most field failures!
Maintenance Requirements and Lifespan Expectations
Even a carefully chosen sliding gate guide block will eventually wear out. In South Africa, the combination of dust, high UV, and sudden thunderstorms makes regular inspection essential. Check the block’s contact face for scoring or melting, and confirm the mounting bolts remain tight. When lubricating, use a sparing hand; excess grease traps grit and accelerates erosion. Many homeowners overlook the underside of the block, where debris collects and grinds into the track surface.
Listen for these warnings of imminent failure:
- A scraping sound that changes with gate speed
- Visible play between the block and the rail
- Deep grooves on the guide surface
A properly maintained sliding gate guide block on a residential gate usually serves five to seven years. Heavier commercial setups might need replacement every two years. Gate balance and track alignment matter more than brand when predicting lifespan. A delayed replacement typically leads to damage in the track, wheels, and gate motor, turning a minor fix into a major expense.
Step-by-Step Installation Procedures
Pre-Installation Measurements and Site Preparation
Before you start wrestling with a sliding gate guide block, measure everything that can hold a measurement. The site prep phase separates a smooth-running gate from a morning clatter that wakes your neighbours in Johannesburg. Use a straight edge and spirit level to check the concrete strip along the entire travel path. A drop of even 5 mm will cause uneven wear. Follow this sequence:
- Mark the gate’s open and closed positions.
- Measure the block’s channel width against the gate’s bottom bar.
- Verify that the post bracket sits perfectly vertical.
Remember that South African summer heat can expand the rail, so leave a small expansion gap. Confirm the foundation depth based on your soil’s bearing capacity. Then, and only then, pick up your drill. A hasty installation of the sliding gate guide block will only guarantee future headaches.
Mounting Techniques for Concrete and Asphalt Surfaces
The mounting of a sliding gate guide block begins only after the foundation has fully cured. For concrete surfaces, work through a deliberate sequence.
- Mark the anchor points using the block’s base plate as a template.
- Drill with a hammer drill and a carbide bit to the specified depth.
- Clear the holes of dust and insert the expansion anchors.
- Seat the sliding gate guide block and tighten in a crisscross pattern.
Asphalt surfaces demand a different technique. The material flexes under heat and expands far more than concrete. Mount a steel base plate first, securing it with long screws into the substrate. Then attach the sliding gate guide block to the plate. This two stage method spreads the load across the surface and prevents the asphalt from cracking under the gate’s rolling weight.
Aligning Guide Blocks with Gate Tracks for Smooth Movement
A sliding gate guide block demands patience during alignment. Measure twice, then measure again if the sun is beating down on you. The block must sit parallel to the track, or the gate will complain with every roll. A slight skew multiplies friction and turns smooth movement into a grinding mess.
Check the gap between the block and the track. It should stay consistent along the full length. If you can fit a coin in one spot but not in another, adjust the block before tightening. Fasten everything, then test the gate by hand before connecting the motor.
A simple sequence works well:
- Position the block against the track.
- Shim it for a uniform gap.
- Mark and drill anchor holes.
- Bolt it down and retest.
South African heat and uneven driveways punish careless installation. A properly aligned sliding gate guide block prevents jerky movement and premature wheel wear.
Common Installation Mistakes and How to Avoid Them
Under a copper sky, the sliding gate guide block waits for hands that respect its temper. Bolt it down in haste, and you will hear the gate groan for years. The procedure seems simple, but every bolt has a specified torque. Sink the anchors into pre-drilled holes, level the base plate, then tighten in a cross pattern.
Common mistakes follow the same script. People skip the shim step, leaving a gap that invites the track to rattle. They overtighten, cracking the concrete. They pick the wrong anchor for the soil, and the sliding gate guide block shifts with the first rain.
A checklist keeps the work honest:
- Measure the mounting height twice.
- Clean the surface before laying the base plate.
- Torque each bolt to its stated value.
- Test the gate by hand before connecting power.
Troubleshooting and Maintenance Strategies
Signs of Wear, Misalignment, and Structural Damage
A sliding gate guide block that fails rarely announces itself. The first sign is often a subtle grinding noise during operation. Then you notice uneven gaps between the gate and its track. These symptoms point to wear on the contact surfaces. Inspect the block monthly. Look for flat spots, chips, or a glossy polish that indicates excessive friction.
Misalignment shows up differently. The gate may sag on one side or struggle to move past a specific point. Use a straightedge to check the block’s position relative to the track. Structural damage, like cracks in the mounting base, demands immediate attention. A broken block shifts load to other components, accelerating their wear.
- Visible cracks or deformation in the block body
- Metal shavings or dust accumulating near the guide
- A gate that moves in a jerky, uneven manner
Ignoring these warning signs leads to costly repairs. Regular assessment of your sliding gate guide block prevents small issues from escalating into major failures.
Routine Cleaning and Lubrication Practices
Dust and grit accumulate along the raceway and gradually turn into an abrasive paste. A weekly rinse with clean water, followed by a dry cloth, removes the particulate before it embeds into the sliding gate guide block. For stubborn residue, a mild degreaser proves effective.
Lubrication requires careful attention. I recommend a lithium-based grease on the contact surfaces every three months, or more frequently in coastal air where salt accelerates corrosion. The sequence matters more than the quantity:
- Wipe the guide block thoroughly to remove old grease.
- Apply a thin, even film to the load-bearing faces.
- Cycle the gate several times to distribute the lubricant.
This consistent routine extends the life of your sliding gate guide block, preserving smooth motion and preventing costly component fatigue.
When to Repair vs. Replace Worn Components
Every metal gate eventually whispers its distress before it screams. I have learned to listen for that faint grinding from the sliding gate guide block, a sound that signals the beginning of component failure.
Repair remains viable when the damage is superficial. Light scoring, minor surface pitting, or slight deformation can be corrected through careful resurfacing. The true decision point arrives when structural integrity collapses. Cracks that penetrate the mounting flange, elongated bolt holes, or excessive play that resists adjustment all demand replacement.
These warning signs require immediate assessment:
- Visible fractures along the cast body
- Irregular wear patterns that indicate track misalignment
- Metallic debris collecting on the raceway surface
Do not wait for complete seizure. A compromised sliding gate guide block compromises the entire gate system.
Upgrading Older Systems with Modern Guide Block Technology
South African gates face a peculiar enemy: dust, wind, and the occasional load shedding induced power surge. The sliding gate guide block on an older system often wears unevenly because the track itself has shifted. Before you blame the block, check the track. That sounds obvious, but you would be surprised how many people replace a perfectly functional component while their gate track has a visible bend.
When troubleshooting, keep these checks in mind:
- Measure the gap between block and track while the gate is under load.
- Watch for intermittent sticking, which usually means the track has bowed, not the block.
- Inspect mounting bolts for sheared heads, a sign of impact damage.
Upgrading to a modern sliding gate guide block means self lubricating polymers and sealed bearings. Older cast iron blocks collect grit constantly. The new generation uses composite materials that shed debris naturally.
Safety Considerations and Regulatory Compliance
Preventing Derailment and Accidental Gate Displacement
From my years inspecting automated gates, I have seen what happens when a gate leaves its track. The sliding gate guide block is the component that keeps a controlled gate from swinging loose. It is a small part, but it carries a heavy responsibility.
South African regulations, including SANS 1027, set clear expectations for gate safety. A properly fitted sliding gate guide block prevents lateral movement that leads to derailment. It also stops accidental displacement during high winds or mechanical failure. These are not theoretical risks. They are real, and they happen more often than people think!
When a gate derails, the consequences range from damaged tracks to serious injury. The guide block keeps the gate aligned, absorbing force that would otherwise bend the track or snap the chain. That is why compliance checks focus on this component.
Safety Standards and Industry Guidelines for Gate Hardware
South African regulations are not a suggestion, they are a contract with safety. SANS 1027 and the Occupational Health and Safety Act place a heavy responsibility on property owners to ensure automated gates operate without hazard. In my experience, most compliance failures trace back to the same root cause: an improperly fitted or worn sliding gate guide block. This small component is the primary defense against uncontrolled lateral movement. When it fails, the gate loses its vertical alignment, creating a gap that invites derailment. The consequences are immediate and measurable, ranging from stripped gears in the motor to catastrophic collapse onto a pedestrian.
Adherence to these standards requires more than visual inspection. You must confirm the clearances meet the manufacturer’s specifications and that the hardware is rated for the gate’s mass. The regulatory landscape demands a holistic approach to gate hardware, ensuring every bolt and bushing works in concert.
– Verify continuous welds and bolted connections are free of cracks.
– Confirm the guide block positioning prevents the gate from lifting off the track during manual release.
– Ensure the assembly does not interfere with safety edges or photocell beams.
– Check that the sliding gate guide block is compatible with the specific track profile to avoid pinch points.
Compliance checks often fail on the subtleties of installation. Bolts secured with the incorrect torque, or a guide block mounted a few millimeters off center, create a chronic strain that accelerates wear on the entire system. This operational strain is a natural byproduct of the gate’s daily cycles, and it tests the integrity of every component. A certified installer familiar with SANS 1027 methods will understand that the sliding gate guide block is not merely an accessory, but a critical control measure. Its condition directly determines whether your gate remains a secure barrier or becomes an unpredictable liability.
Integrating Guide Blocks with Automatic Gate Operators
When an automatic gate operator engages, the sliding gate guide block ensures stability. South African safety audits frequently flag installations where this guide block was never integrated into the operator’s control logic. That separation creates a compliance blind spot.
Consider the sequence: the operator moves the gate, the guide block holds the bottom roller against the track, and the safety edge monitors pinch points. If the guide block fails, the gate shifts laterally, the safety edge misaligns, and the photocell beam may no longer register the obstruction. SANS 1027 expects these elements to work as one system.
- Confirm the guide block is rated for the gate mass before programming the operator.
- Check that the release mechanism does not lift the gate off the track.
Regulatory compliance depends on matching the sliding gate guide block profile to the track manufacturer’s specification. A few millimeters of tolerance can change the gate’s behavior under wind load, affecting both safety and motor longevity.
Conducting Regular Safety Inspections and Documentation
Each inspection begins with the gate at rest. Run a hand along the track, feeling for burs and uneven wear. The sliding gate guide block records every gate cycle in polished contact points and hairline stress marks. A beam of torchlight reveals what daylight hides.
Documentation transforms observation into evidence. Every clearance measurement, every torque check, every replaced fastener becomes a line in the maintenance register. South African property managers who keep these records find SANS 1027 audits proceed smoothly because their documentation matches the physical state of the installation.
- Photograph the guide block from three angles each quarter
- Record the gap between the block and the track in millimeters
- Log any deviation from the manufacturer’s specification on the day it appears
Recurring measurements reveal the pattern. A sliding gate guide block that drifts two millimeters every six months behaves differently from one that holds position for years. Documentation catches slow changes before they fail.
Ensuring Pedestrian and Vehicle Clearance Around the Gate Path
A gate in motion occupies space that people and vehicles may assume is empty. That assumption causes accidents. The sliding gate guide block keeps the gate travelling a consistent line, which means the clearance zone stays constant. If the gate wanders, the hazard zone wanders with it.
Clearance is not a courtesy. SANS 1027 requires pedestrian walkways to remain separate from vehicle access points. The gate path must stay unobstructed.
The clearance zone includes:
– The full sweep arc of the gate leaf
– The distance between pedestrians and the moving edge
– The setback of vehicle stopping positions from the gate line
South African property managers who respect these boundaries reduce liability and pass audits with fewer corrections.
Emergency Release Mechanisms and Manual Override Protocols
As any South African property manager will tell you, the sliding gate guide block is the silent martyr of the access control world. It endures the daily grind, the rain, and the occasional careless driver, all to keep your gate moving in a straight line. But when the power fails or a motor burns out, this humble beast becomes the lynchpin of your escape plan. The guide block ensures the gate leaf remains perfectly aligned during a manual push, meaning you will not spend your Friday afternoon wrestling a two-tonne steel slab back into its track.
Regulatory compliance in this country is not a suggestion; it is a legal requirement. SANS 1027 dictates that automatic gates must have a manual release mechanism that a user can operate without specialized tools. However, a release mechanism is useless if the gate then derails because the guide block has loosened. The emergency release process requires the gate to run smoothly by hand. If your guide blocks are worn, the gate will skew and jam, leaving you trapped on the wrong side of your own perimeter.
The manual override protocols should be drilled into security staff, not just printed in a manual that collects dust. Here is what needs to be verified during a failure:
– The clutch or release key is accessible and functional.
– The gate can be moved manually with minimal resistance.
– The sliding gate guide block is secured and free of debris.
– The track is clear of obstructions that could stop the manual roll.
A gate that cannot be moved manually is a safety hazard. Many automated systems rely on a simple mechanical release, but the friction from a misaligned leaf can render that release ineffective. You are not just maintaining hardware; you are maintaining the ability to evacuate or secure your premises during an emergency. Check that your guide blocks have not shifted out of tolerance, because a few millimetres of movement can mean the difference between a smooth manual push and a permanent parking ornament. The machinery appreciates a good stretch, but not the kind that involves a crowbar.




0 Comments